
Connecting your RaspberryPi to AWS IoT
I am a Master Principal Cloud Architect for Oracle Cloud (OCI). I create content designed to help developers with Cloud-Based technologies. This includes AWS, OCI, and occasionally Azure. I'm not excluding GCP, I just haven't had any excuse to dive into GCP yet. As far as development is concerned, my area of focus is predominantly .NET, though these days, I do branch out occasionally into NodeJS and Python. I am available for in-person speaking events as well as virtual sessions. I can usually be found at Boston Code Camp. Opinions expressed on my blog are my own, and should not be considered to be the opinions of my employer.
In my last article "IoT for the .NET Developer", I covered how you can get .NET 7 installed and running on your RaspberryPi. In this article, I am going to cover how to get your Raspberry Pi set up and connected to AWS's IoT Core.
There are two main ways to connect to AWS's IoT Core service, MQTT and Device Shadow. To start with we are going to use MQTT. I will be discussing the different ways to communicate on the Basement Programmer PodCast's February episode, but for now, MQTT is easy, and it suits the use case that we are working through.
The companion video to this blog post can be found here: https://youtu.be/CwEmyObhLkc
Source Code is available here: https://github.com/BasementProgrammer/IoTSamples
Prerequisites
The only prerequisites that are necessary for following this guide are the following:
Raspberry Pi set up and configured with internet access
A code editor (Visual Studio Code)
.NET 7 installed
An AWS Account
If you were able to follow along on the last blog post, then you have everything that you need to go through this blog post. I will be using Visual Studio Code for all of the coding exercises, but you can use another code editor if you prefer. I am running VS Code on my desktop and using the remote coding Extension that was installed as part of the last blog post.
Use US-East-2
The sample code that I provided on GitHub is set up to use US-East 2 for connecting to the IoT services. You should use us-east-2 to complete the steps in this blog post. I will cover how to change your region later.
Create your 'thing'
Given that IoT stands for Internet of Things, every device you get set up and configured is called a 'Thing.' The first step in connecting a device is to create a thing in the AWS Console.
These instructions follow a process for creating a single thing. Creating things one at a time is fine for prototyping and working with a small number of devices, however, creating individual things would be highly impractical for working with large numbers of devices. If you are planning on moving from a prototyping phase to a real-world deployment of hundreds, thousands, or even millions of devices, then you really should get in touch directly with AWS and speak with some IoT specialists.
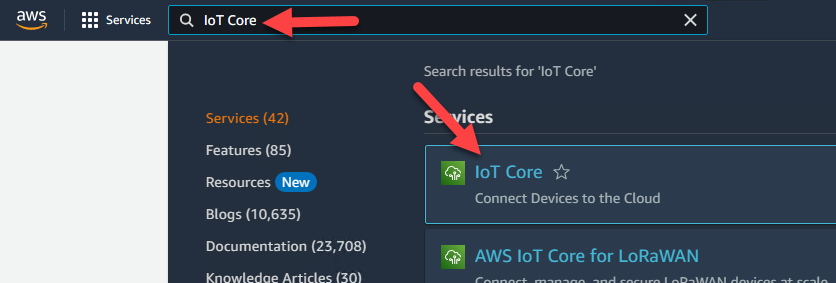
Log into the AWS console. From the search bar, type "IoT Core" and then click on the IoT Core service.
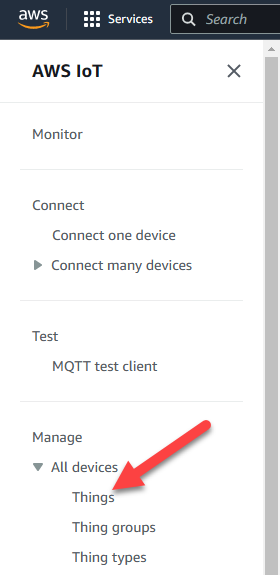
From the left-hand navigation area, expand "All devices" and click "Things"
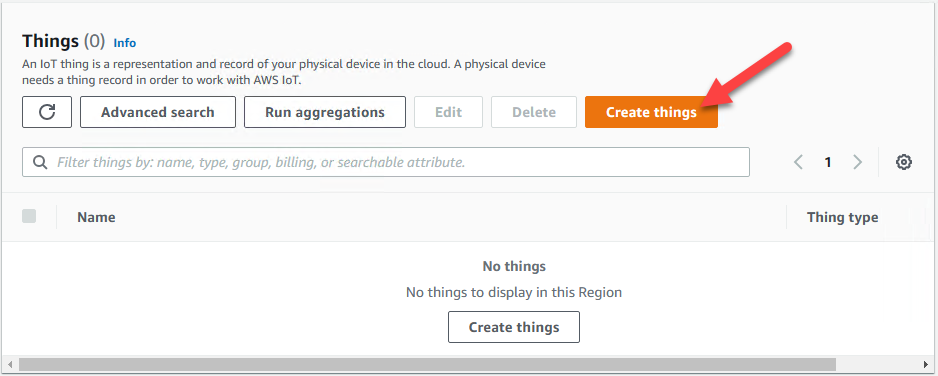
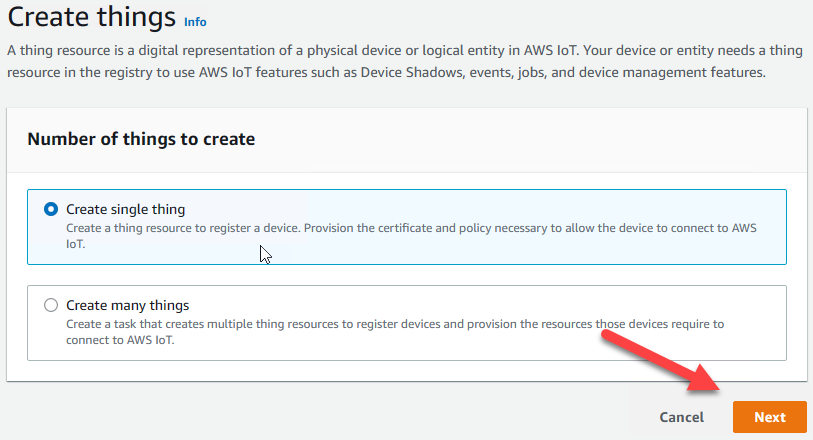
You will be shown a list of all the Things defined in your account. If this is your first interaction with IoT will be none. From here click "Create things"
At this point, we will create a single thing, so leave the default "Create a single thing" selected and click Next.
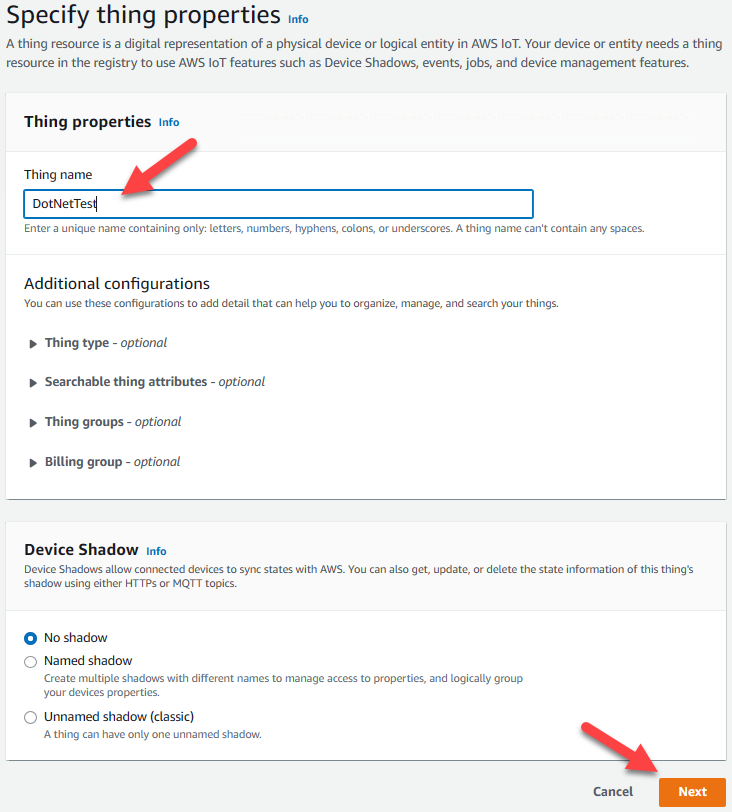
The next screen allows you to specify the properties of your thing. You have to give your things a name, in this case, use "DotNetTest"; leave all of the other options alone, and click Next.
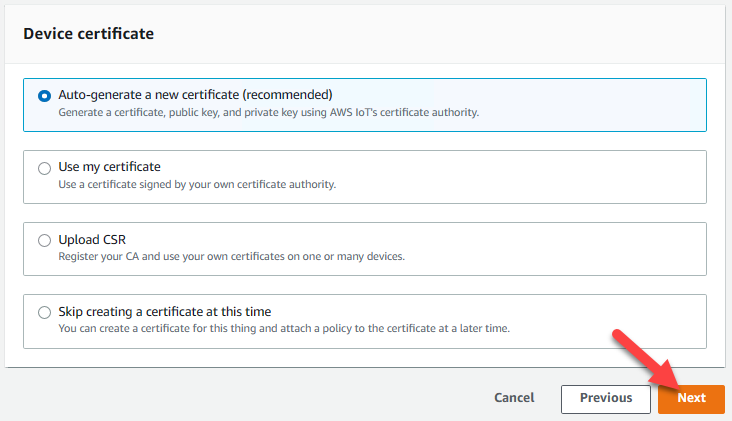
At his point, you will choose how your device certificates are provisioned. Certificates are the means of identification for the device. Choose the default to Auto-generate your certificate and click next.
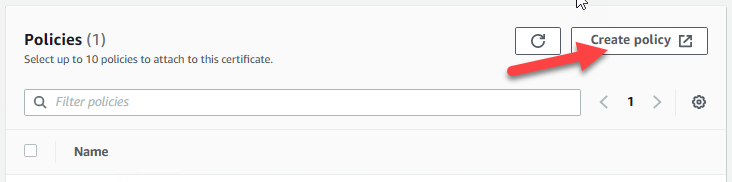
The next page allows you to select the permission policies that will apply to your thing. Without a policy, your thing will not have permission to access any resources. Click "Create Policy"
Create a new policy called "DotNetPolicy." Click the option to enter the policy in JSON and enter the following policy text, and click create.
{
  "Version": "2012-10-17",
  "Statement": [
    {
      "Action": [
        "iot:Publish",
        "iot:Subscribe",
        "iot:Connect",
        "iot:Receive"
      ],
      "Effect": "Allow",
      "Resource": [
        "*"
      ]
    }
  ]
}
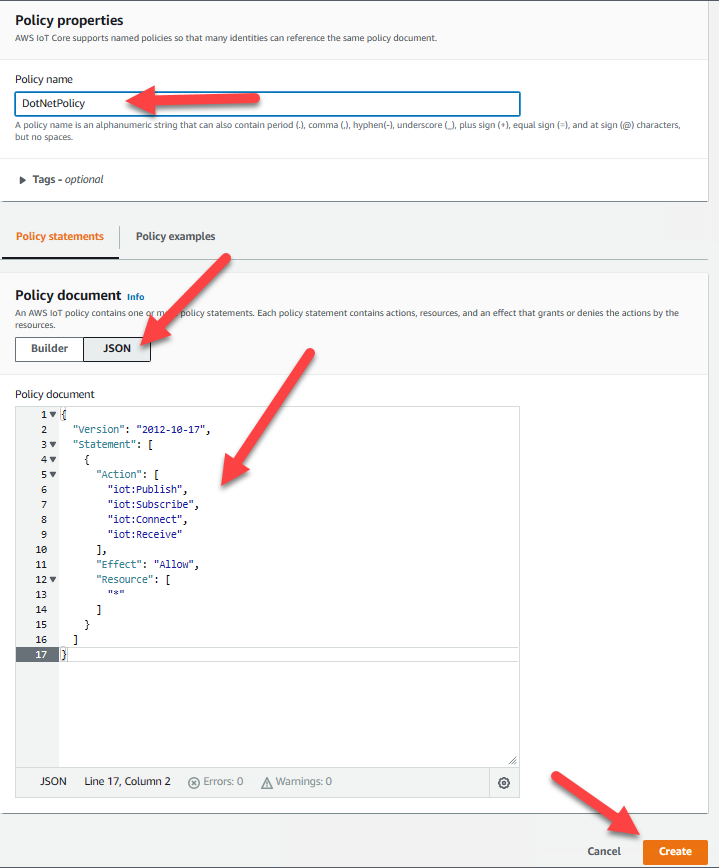
Warning This is an extremely permissive policy, and is only being used for demo purposes. you should NOT use this policy in a production environment. We will cover IoT security in a separate blog post. We are only using this policy at the moment to get up and running easily.
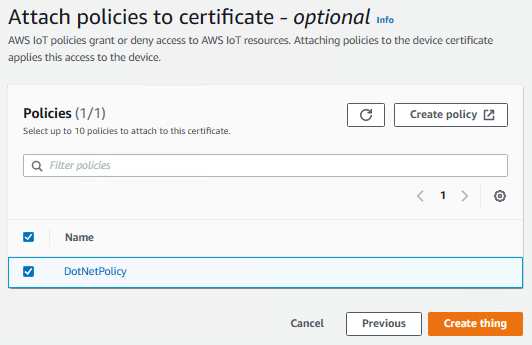
Once you have your policy created, you can return to the creative thing process. Select the policy that you created before, and then click "Create thing."
Once your thing has been created, you will be presented with the following page. It is important that you download all five files at this time, as some files will never be accessible again.

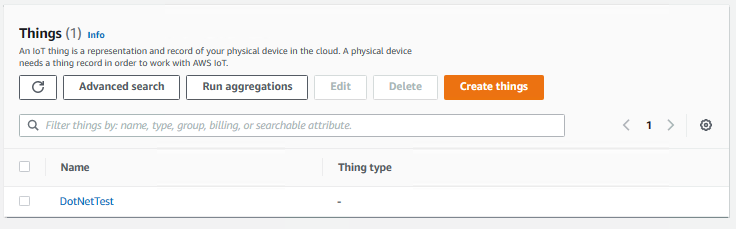
Once you have downloaded the files, click done and return to the list of your things.
Set up the test code
Start VS Code, either directly on your Pi, or via a remote connection. In your source folder type
git clone git@github.com:BasementProgrammer/IoTSamples.git
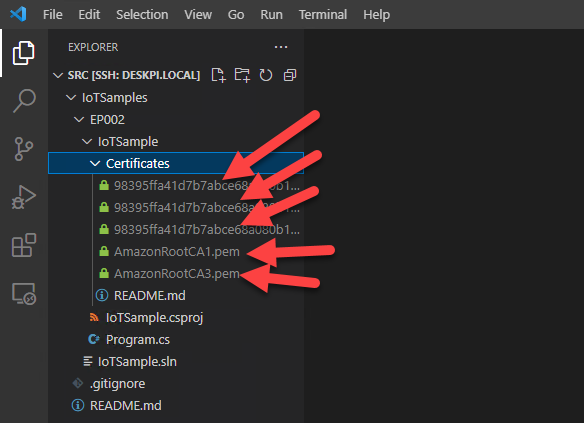
This will download the sample application code from the Basement Programmer GitHub repo. Once the repo has been copied, expand the folder structure in VS Code so that you can see the Certificates folder under Episode 2's project.

You need to copy the certificate files that were downloaded to the project directory. If you are using Windows you can do this via Drag and Drop from file explorer. If you are using a Mac, similar functionality is available via Finder.
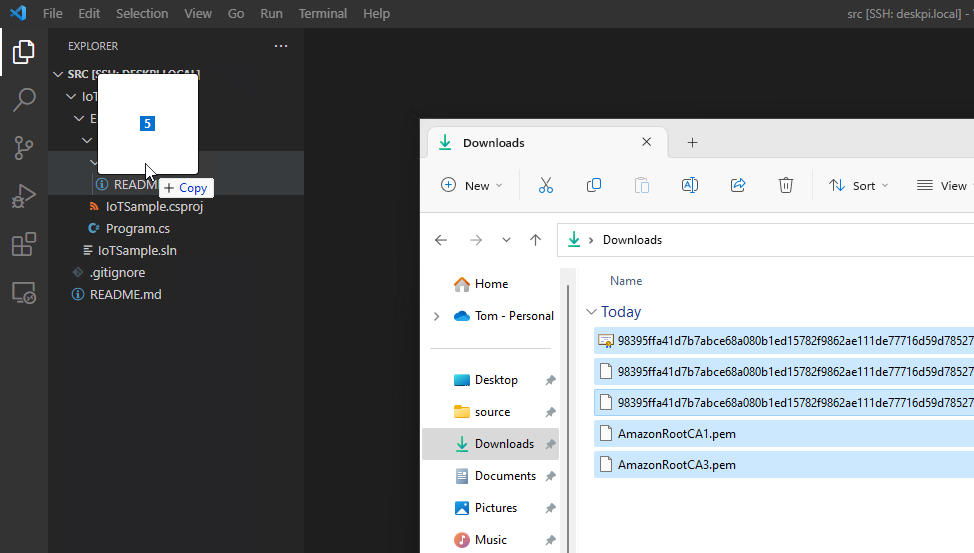
When the files have been copied over, the display will refresh showing you the files that now exist on the RaspberryPi.
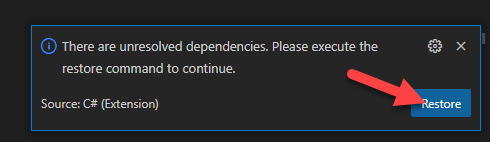
Open the test code file Program.cs. When you open the file, you will receive a message about unresolved dependencies needing to be downloaded. Click "Restore". This will download the NuGet packages for the MQTT framework that is being used.
Open up your IoTSample.csproj file. Find the ItemGroup for the NuGet packages:
  <ItemGroup>
    <PackageReference Include="M2MqttDotnetCore" Version="1.1.0" />
  </ItemGroup>
Immediately after this item group, add the following code to your file. Replace the names of the certificate files with the names of the files you downloaded. Each of the device certificate files starts with a string of random characters. Replace {id} in the below text with the character string from the file name. Ie. 98395ffa41d7b7abce68a080b1ed15782f9862ae111de77716d59d7852755486-certificate.pem.crt
<ItemGroup>
    <None Update="Certificates\AmazonRootCA1.pem">
      <CopyToOutputDirectory>Always</CopyToOutputDirectory>
    </None>
    <None Update="Certificates\AmazonRootCA3.pem">
      <CopyToOutputDirectory>Always</CopyToOutputDirectory>
    </None>
    <None Update="Certificates\{id}-certificate.pem.crt">
      <CopyToOutputDirectory>Always</CopyToOutputDirectory>
    </None>
    <None Update="Certificates\{id}-public.pem.key">
      <CopyToOutputDirectory>Always</CopyToOutputDirectory>
    </None>
    <None Update="Certificates\{id}-private.pem.key">
      <CopyToOutputDirectory>Always</CopyToOutputDirectory>
    </None>
  </ItemGroup>
This code ensures that when the project is built, the certificate files are copied to the output directory to be used. Copy the string of characters to use in the next step.
In the file Program.cs, find the line of code that looks like this:
private const string thingName = "THING_NAME_HERE";
Replace the text "THING_NAME_HERE" with the string of text that you copied from the certificate name.
private const string thingName = "98395ffa41d7b7abce68a080b1ed15782f9862ae111de77716d59d7852755486";
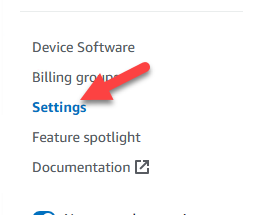
You need to update the sample code with your account IoT Endpoint to communicate with the AWS IoT Core service. In the AWS Console, select IoT Core, then scroll down the left-hand navigation panel, click "Settings"
From here, you can find the endpoint for the region that you are trying to connect to:
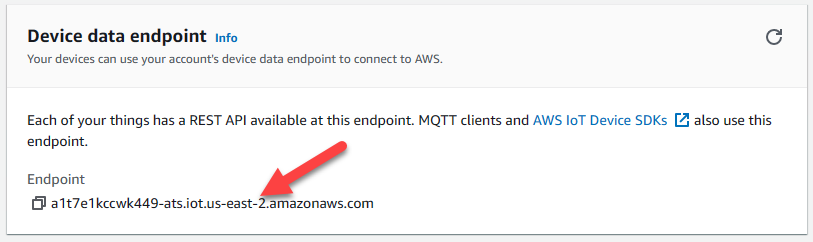
Copy this setting and update the source code's definition for the endpoint.
private const string iotEndpoint = "a1t7e1kccwk449-ats.iot.us-east-2.amazonaws.com";
From a terminal, in the "IoTSamples/EP002/IoTSample" folder type the following command:
dotnet run
The sample application will compile, and then start executing. You should see the following output.
Published: Ping!  0
Message Received: Ping!  0
Published: Ping!  1
Message Received: Ping!  1
Published: Ping!  2
Message Received: Ping!  2
Published: Ping!  3
Message Received: Ping!  3
Published: Ping!  4
Message Received: Ping!  4
While the application is running, open your browser and return to the AWS Console. In the IoT Core service, select the "MQTT test client' item from the left hand navigation.

In the "Subscribe to a topic" section, type "sdk/test/dotnet" and click "Subscribe.

Your display will update and start showing you the messages that are being sent through the AWS IoT Core platform from your device. At this time you may way to click the Heart next to the subscription name to mark this as a favorite. It will make it easier to find later.
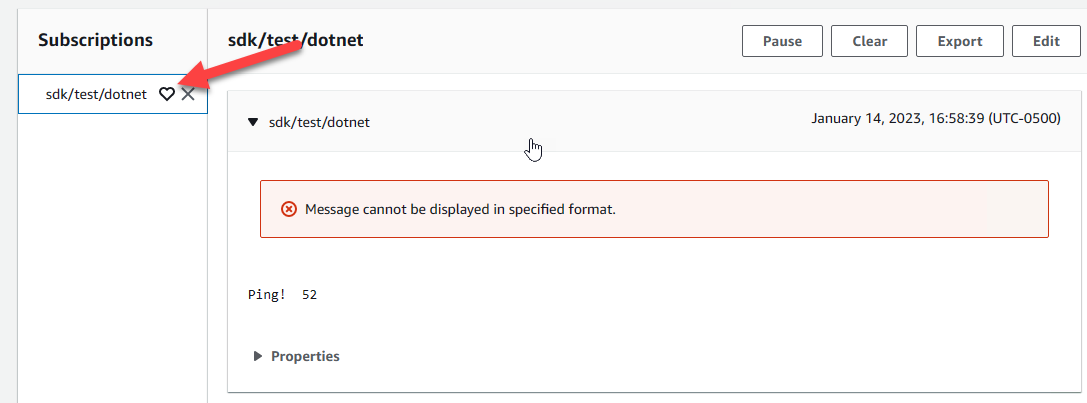
You can see the messages flowing through. In the picture above the message that was delivered was "Ping! 52"
Congratulations, you have successfully connected an IoT device to the AWS IoT Core and sent messages through. In the next section, we will explore the code of IoT Sample code so that you can understand what is going on.
Examining the sample code
The following code sets up the endpoint that the application connects to. You would change this value if you were using a different region to connect to the AWS IoT Core service.
private const string iotEndpoint = "a1t7e1kccwk449-ats.iot.us-east-2.amazonaws.com";
The following code defines the topic that the application will communicate on.
private const string topic = "sdk/test/dotnet";
The following code sets up the MQTT client. It creates an event handler which is used to receive messages that are published on the topic. In this case, we will use the same topic to both publish and receive messages.
_client = new MqttClient(iotEndpoint, brokerPort, true, caCert, clientCert, MqttSslProtocols.TLSv1_2);
_client.MqttMsgPublishReceived += Client_MqttMsgPublishReceived;
_client.ConnectionClosed += Client_ConnectionClosed;
The following code connects the MQTT client and sets up a subscription to receive messages published on the topic. The subscribe method call accepts an array of strings which allows the client to subscribe to multiple topics with a single command. The second parameter specifies the Quality of Service that the connection uses.
_client.Connect(_clientId);
_client.Subscribe(new string[] { topic }, new byte[] { 0 });
The following code publishes messages to the topic defined earlier.
_client.Publish(topic, Encoding.UTF8.GetBytes($"{message} {i}"));
Finally, the code below is triggered when a message is received from the subscription. The code simply writes any messages received to the console.
private static void Client_MqttMsgPublishReceived(object sender, uPLibrary.Networking.M2Mqtt.Messages.MqttMsgPublishEventArgs e)
{
    StringBuilder sb = new StringBuilder();
    foreach ( byte b in e.Message)
    {
         sb.Append(Convert.ToChar( b));
    }
    string message = sb.ToString();
    Console.WriteLine("Message Received: " + message);
}
Summary
Once you have .NET 7 installed on your IoT device, connecting to AWS's IoT Core is fairly simple. Messages have transferred both ways over topics that you can define to suit the needs of your applications.
Check out the companion video over on YouTube